# Auto-posting to OneSignal Web Push Notifications
In this tutorial, we will show how you can auto-post from Joomla to OneSignal web push notifications.
Once the previous step is completed, the configuration of a Push channel follows these steps:
prerequisites:
- Perfect Publisher 9 or superior,
- A OneSignal account.
Once you have checked the prerequisites, proceed with step 1.
# STEP 1: Creation of the account and the associated platforms
OneSignal provides a unified service to deliver messages across iOS, Android, Amazon Fire, Windows Phone, Chrome Apps and Amazon Alexa. At the end of the account configuration and app creation, you must have the following IDs and keys to configure Perfect Publisher:
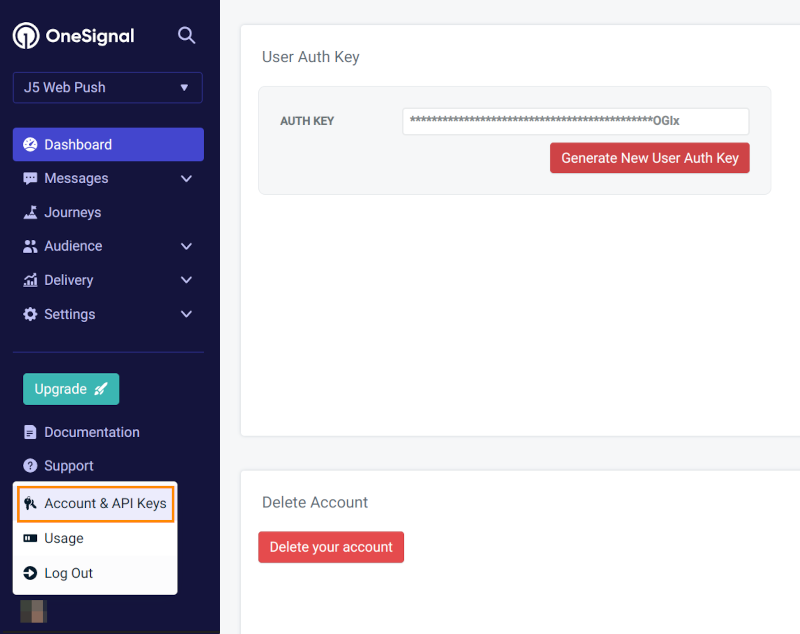
- Account/ Account & API Keys/ User Auth Key
- App Settings/ Keys & IDs/ App ID
- App Settings/ Keys & IDs/ REST API Key
You can find your User Auth Key in your profile, Account & API Keys. This key is shown only once, you have to generate a new key, copy and save it for later.
To create an app, go to Apps, and click on New App/Website**.
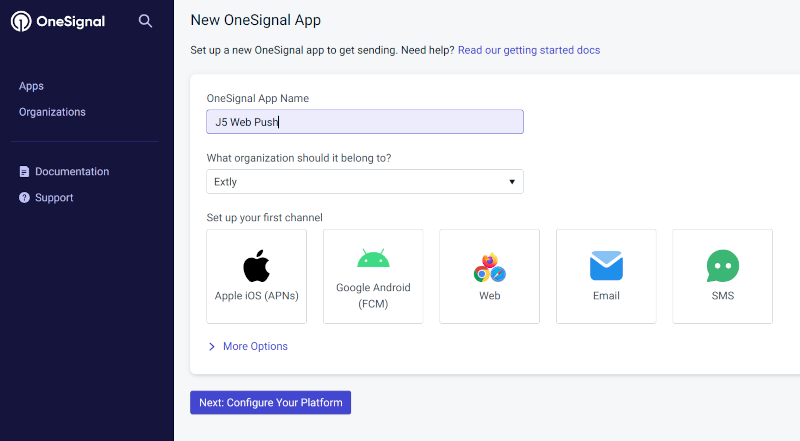
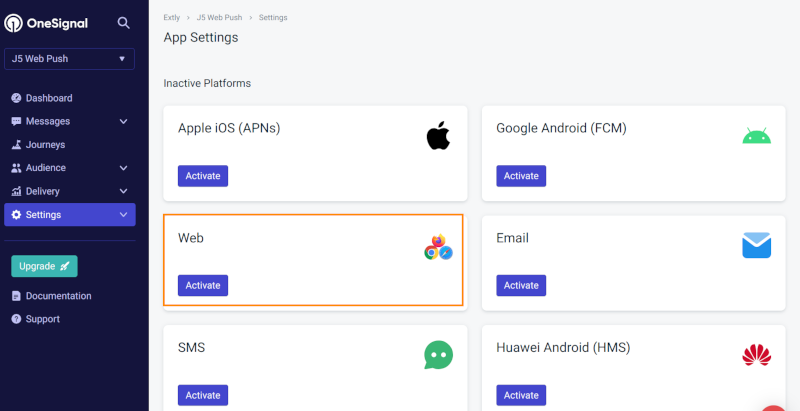
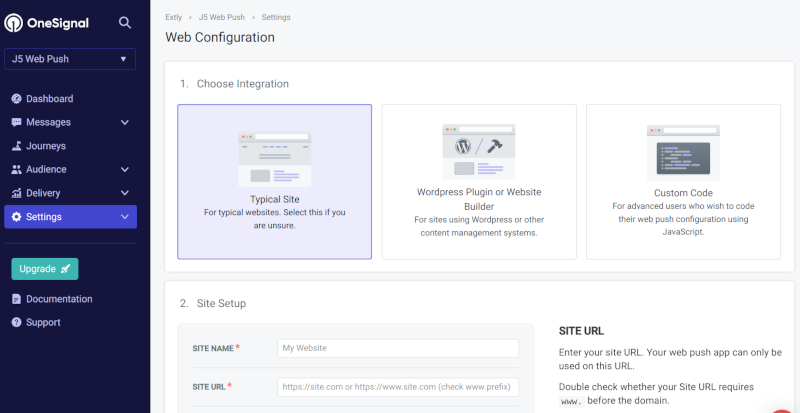
Go to the app dashboard to configure the platform. In this case, select Web. Complete the steps 1 to 5, choosing Typical Site for the integration.
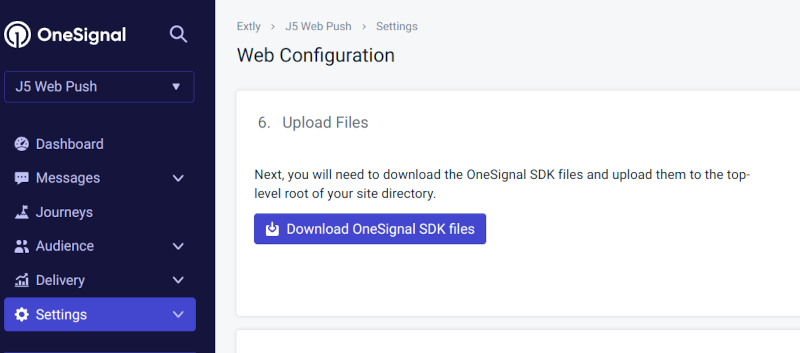
In the Step 6 download the OneSignal SDK files.
 .
.
Unzip the file and copy the OneSignal SDK Service Worker files to the root directory of your website.
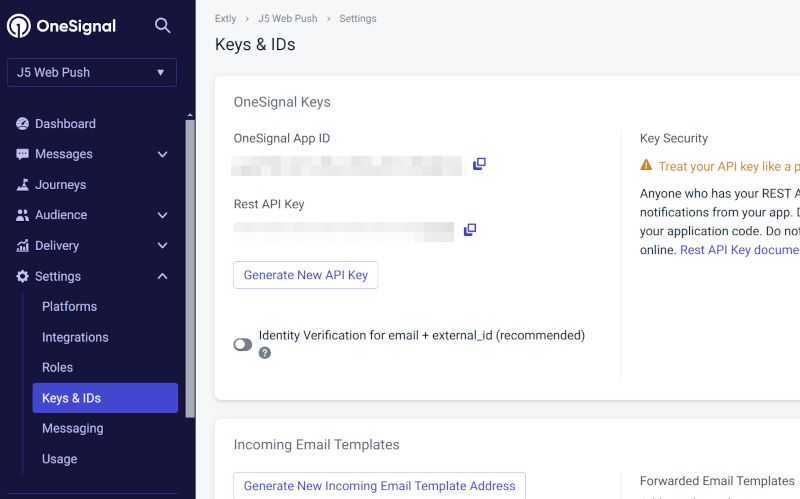
The configuration of the platform is complete. You will find your Keys in Settings, Keys & IDs:
 .
.
NOTE
Please, double-check to have all the required IDs and Keys, before proceeding with the rest of the configuration: App ID, REST API Key, User Auth Key.
# STEP 2: Perfect Publisher configuration
Download the extension from Extly's Download Area (opens new window), unzip and install Perfect Publisher in Joomla! backend with the standard procedure.
About Perfect Publisher updates: Install the update with the same procedure.
Once you have proceeded with the installation:
-Perfect Publisher component has been installed -System plugin - Perfect Publisher Automator has been installed and enabled to process new content and posts every 3 minutes -System plugin - Perfect Publisher for Joomla! Content (Articles) has been installed and enabled to publish Joomla! content.
TIP
Remember to assign your Download ID to enable all features.
You also have to enable the Web Push plugins:
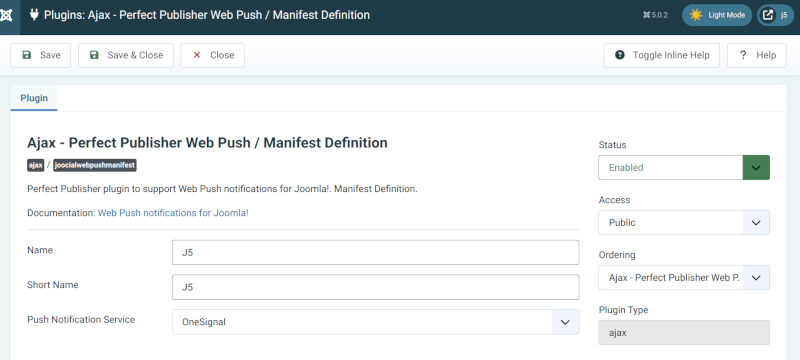
- System Plugin Ajax - Perfect Publisher Web Push/Manifest Definition
Enable the plugin and select the push notification service. Save:
 .
.
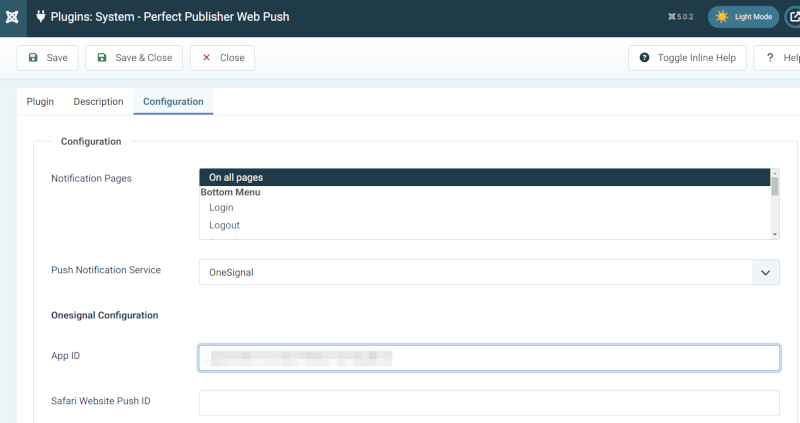
- System Plugin Perfect Publisher Web Push
Enable the plugin, go to Configuration, select the push notification service and complete the App ID. Save.
 .
.
Check that the OneSignal Prompt is shown on your website and click on it to subscribe to notifications before sending a web push.
 .
.
# STEP 3: Create and authorize a channel
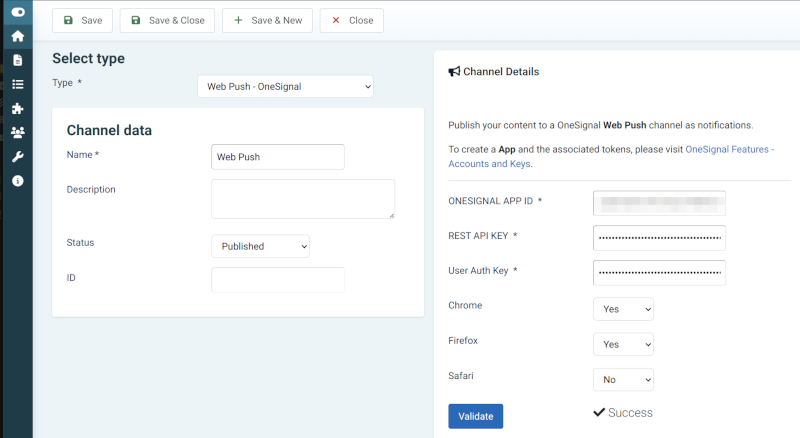
Go to the Perfect Publisher Control Panel and select the Channels tab to create a new channel.
On the Channel Tab, click on New, select the Channel Type and complete the Channel Data:
Fill in the OneSignal App ID, REST API Key and the User Auth Key. Select the browsers to send notifications. Click on Validate. Save.
Perfect Publisher is ready to publish!
By default, all new articles are going to be published on OneSignal.
# STEP 4: Create a test notification
- Create a message in the Composer
- Check the Request list
- Wait 3 minutes, visit the front page
- Check the Posts list
- Notification will be shown on the pages selected.